How to Automatically Import macOS Screenshots into Photos

Apple loves to bang on about creating seamless and synergistic experiences. After all, Steve Jobs used to trot out the phrase “It just works” to describe any new product or service. Dig a bit deeper though and you’ll find a few anomalies that don’t align with their philosophy.
The one I wanted to focus on is macOS screenshots.
Capture a screenshot on your iPhone (by holding the side and volume up buttons) and it’ll land in the Photos app. Take one on your iPad and the same happens.
So far, so good.
Do the same on your MacBook (Command + Shift + 3), however, and it’ll be dumped onto your desktop by default.
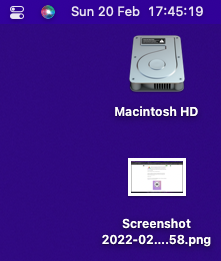
Before macOS Mojave, Apple’s official capture app, Grab, could be used for capturing purposes. However, there was no simple way of changing where the files were stored, so you had to go out of your way by writing a Terminal script.
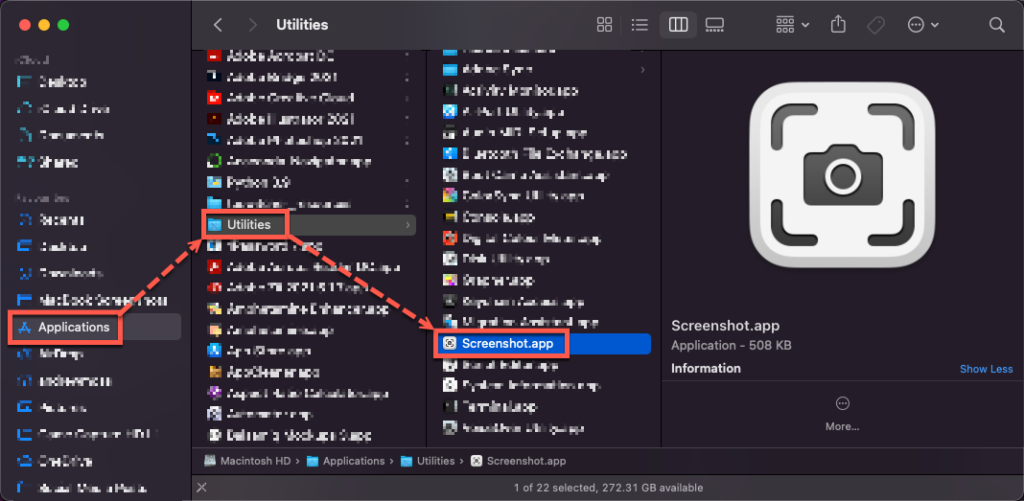
Thankfully, you can change the destination more easily in Screenshot—Grab’s successor. It can be found by going to Finder > Applications > Utilities > Screenshot.app.
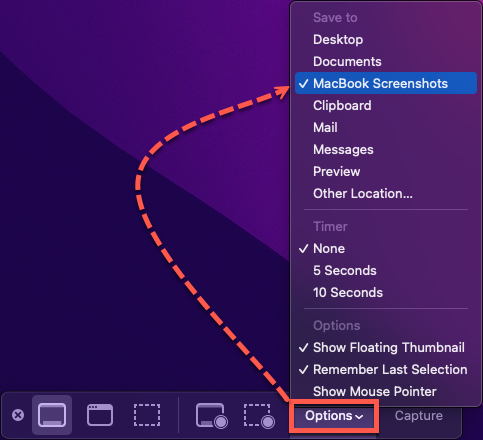
Inside Screenshot, click on the Options dropdown to designate a Save to location.
You can either select one of the defaults or choose Other Location. I use a custom folder called MacBook Screenshots.
Despite the improvement, one gaping problem remains: screenshots cannot be saved directly to Photos. Given the intrinsic link between capturing with your MacBook, iPhone and iPad, separating the first from the other three has never made sense.
The workaround is to use the pre-installed Automator app to build a custom workflow. This will automatically import any new file in your screenshots folder.
1
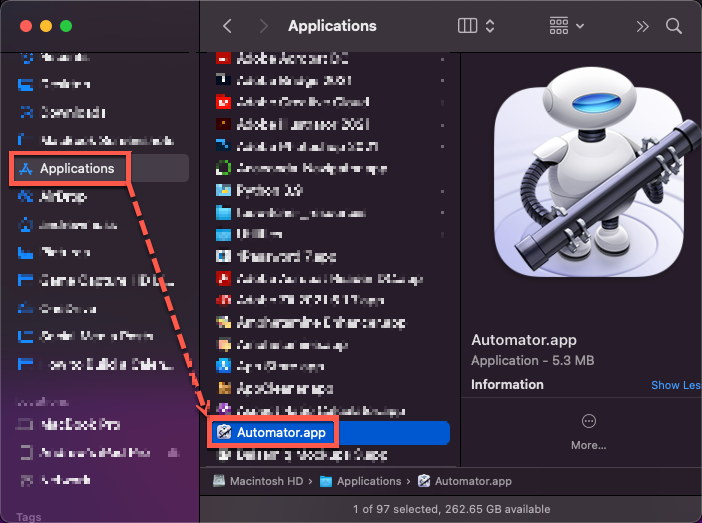
Launch Automator by going to Finder >Applications > Automator.app.
2
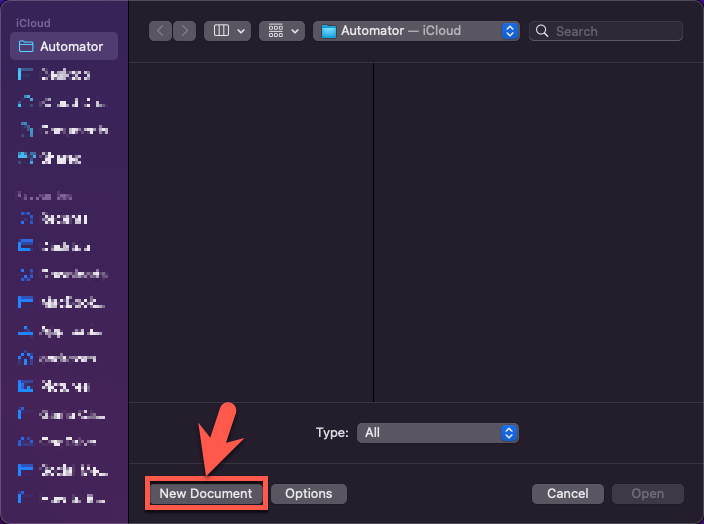
Click New Document.
3
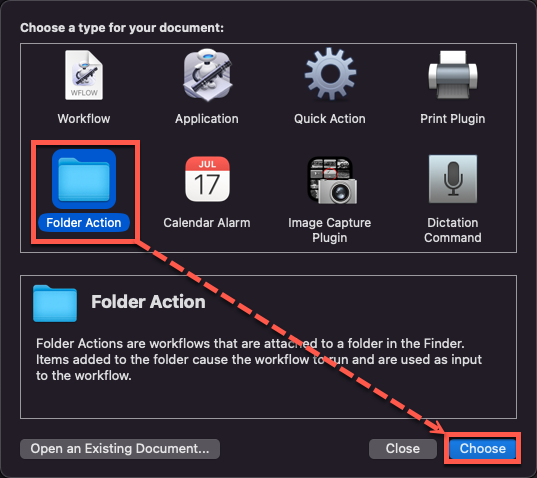
Select Folder Action and click Choose to open the main window.
4
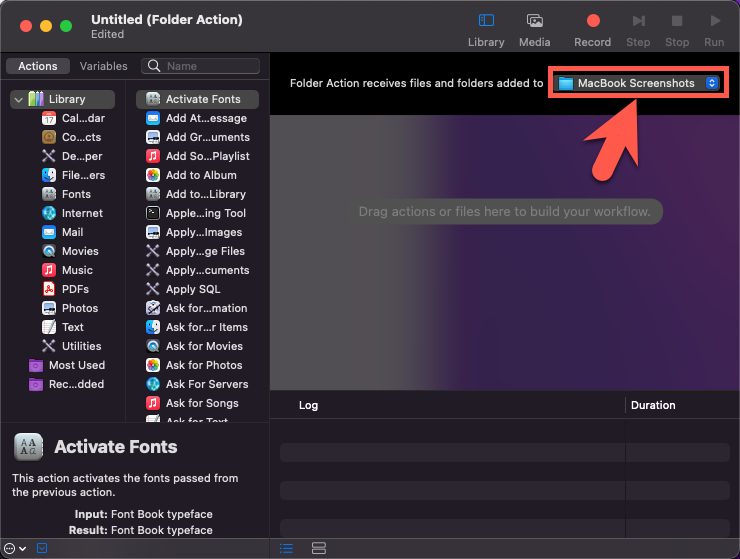
Locate your screenshot folder in the Choose Folder dropdown.
5
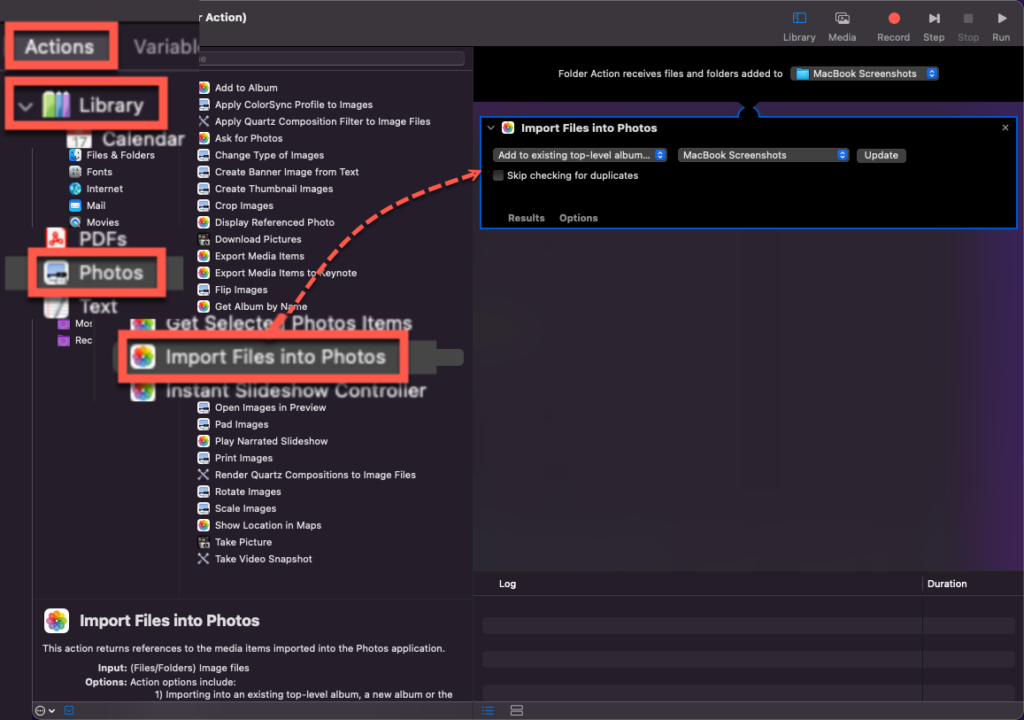
In the Actions tab, expand the Library panel item, select Photos, and drag Import Files into Photos into the action area.
6
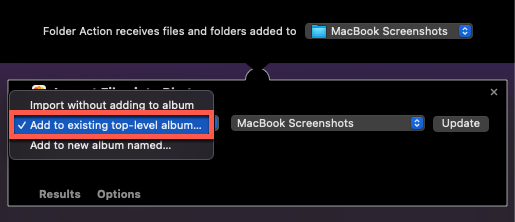
In the first dropdown, choose either:
- Import without adding to album
- Add to existing top-level album…
- Add to new album named…
I’ve already created a folder called MacBook Screenshots in Photos, so I’m picking the middle option.
7
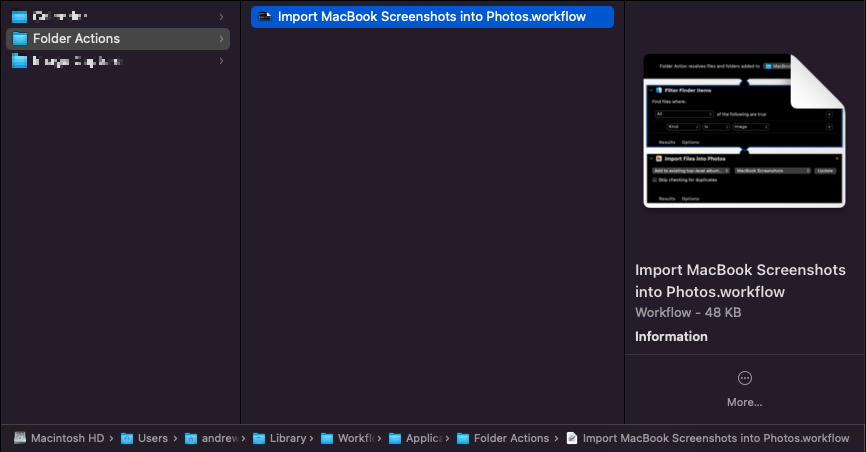
Go to File > Save and name your workflow Import MacBook Screenshots into Photos.

In an active Finder window, press Command + Shift + G and paste ~/Library/Workflows/Applications/Folder Actions. This is the default location for saved Folder Actions.
8
Your workflow is ready!
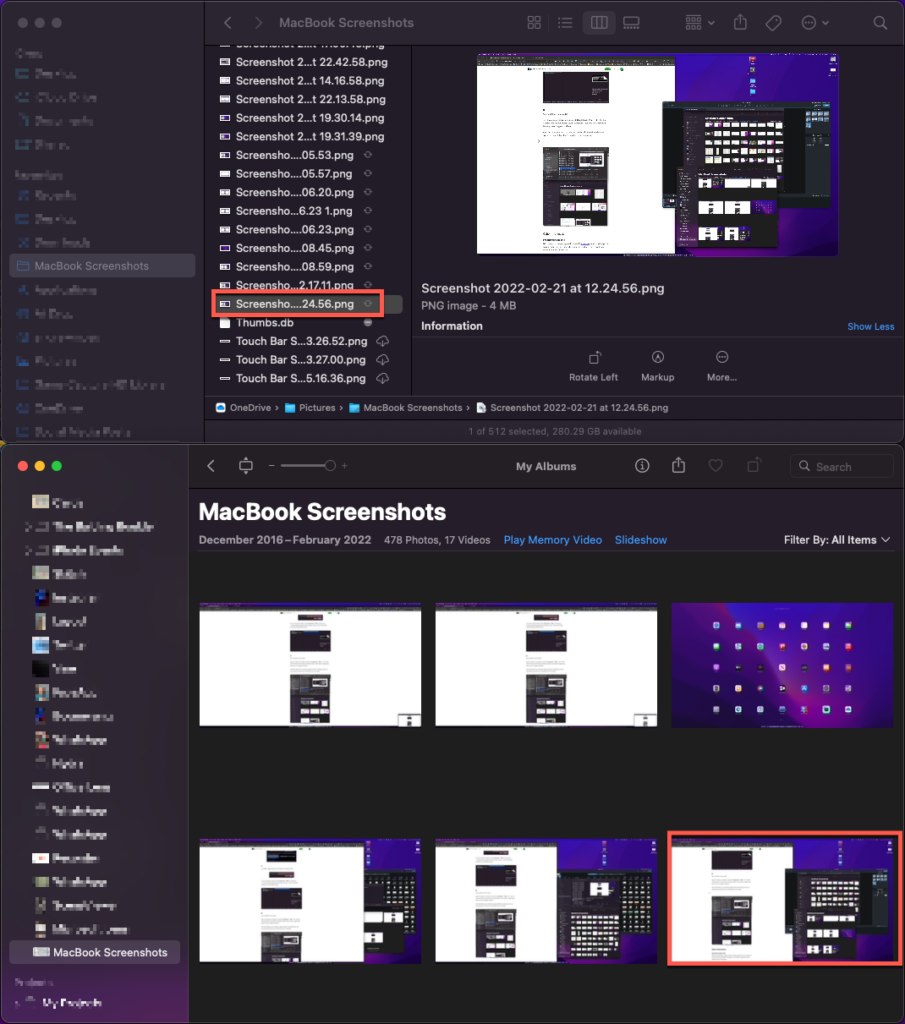
Test it by taking a screenshot on macOS (Command + Shift + 3). The file will first land in your chosen screenshots folder. There will be a slight delay before you see it appear in Photos.
Also check Photos on your iPhone and iPad. Sometimes there are synchronisation issues, but it should get there eventually.
Other Information
Importing Images Only
With the current setup, captured videos will be treated the same as images. If you only want the workflow to trigger for screenshots, you’ll need to add another action in Automator.
This time, choose Files and Folders and drag and drop Filter Finder Items above the existing action.
Ensure the dropdowns match the following: All, Kind, is, and image.
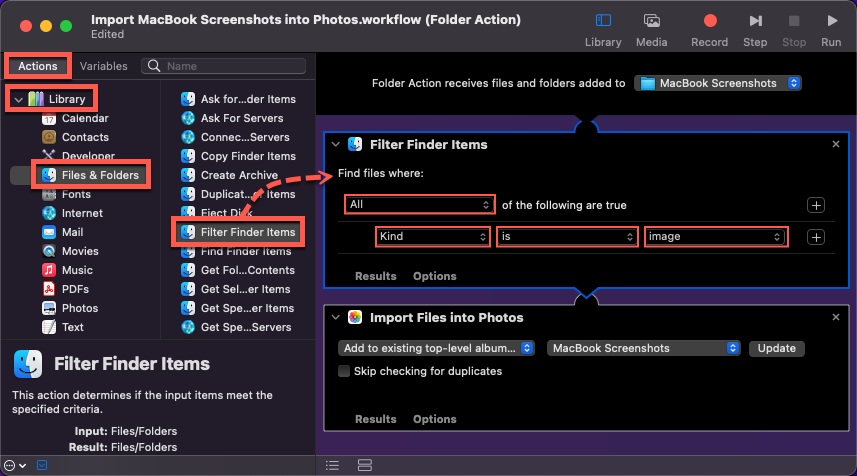
Save your changes and now videos will be ignored!
Disabling Workflow
If you want to disable your workflow or part of it, right-click on the action(s) and select Disable. Undo this by choosing Enable.

Moving the file out of Folder Actions also prevents it from being detected.