How Fast is Fast Data Load in Power Query?

In my previous article, Analysing 10 Million Rows in Excel, I showed you how to load a dataset into Power Query consisting of 10 million rows. In truth, it can handle a lot more than that, but I just wanted to dispel the myth that a million worksheet rows is all Excel is capable of.
This time, I am going to experiment to see how long it takes to load datasets of varying sizes. I will also be comparing Power Query’s loading performance with and without Fast Data Load enabled.
As a way of combatting the lengthy waits some users were experiencing, Microsoft updated Power Query in 2015 to include this feature as an alternative to the default Background Data Load.
The advantage is additional CPU power and RAM is utilised to load a query faster. However, the drawback is Excel will become unresponsive for this duration, so it’s not recommended if you want to work simultaneously.
Across the web, there is already theoretical and anecdotal evidence that it is indeed quicker, but I’m not aware of a study that demonstrates the extent of the performance gains.
Although my experiment is probably the most detailed yet, I won’t go as far as to say it is a full-on scientific experiment! After all, I am only carrying it out on my computer.
Each stage is explained so you know my exact process. Feel free to join in if you wish; I would be interested in your results.
Where is Fast Data Load?
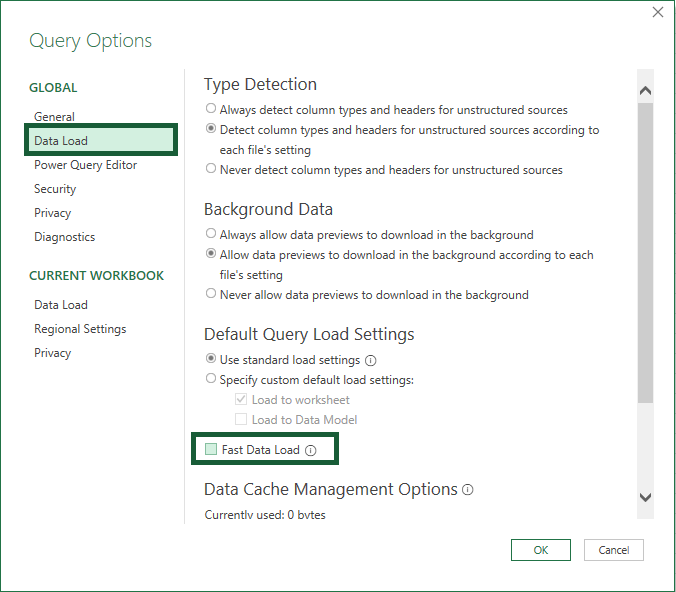
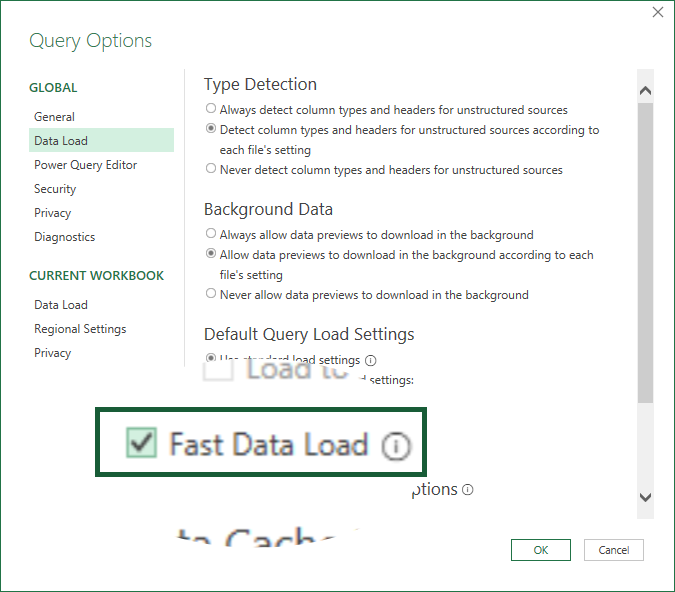
The Fast Data Load option is found by going to Data (tab) > Get Data (dropdown) > Query Options (button). A window pops up and you’ll see its checkbox in the Data Load panel section.

Hardware/Software Considerations
Numerous hardware and software variables may or may not impact loading times. Hardware-wise, having a decent processor, lots of RAM and an SSD hard drive helps, but how Excel utilises it is just as important.
There are also things like what foreground and background processes are running that may throttle performance elsewhere.
It’s difficult to say what effect they have without carrying out rigorous scenario testing, but the vast majority are likely to have a negligible impact.
Computer Specifications
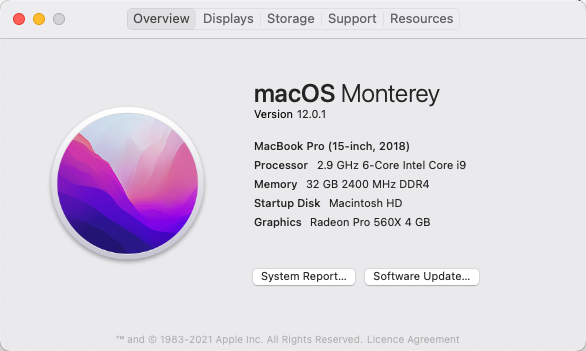
The experiment will be carried out on my computer. Here are its specifications:
15.4″ MacBook Pro 2018
Operating System: macOS Monterey v12.0.1
Processor: 2.9 GHz 6-Core Intel Core i9
Memory: 32 GB 2400 MHz DDR4
Graphics: Radeon Pro 560X 4 GB
Storage: 1 TB SSD
I also run Parallels Desktop for Mac, which allows me to use Windows as a virtual machine. This is necessary to run the proper version of Excel, as the macOS one is well naff! 😁
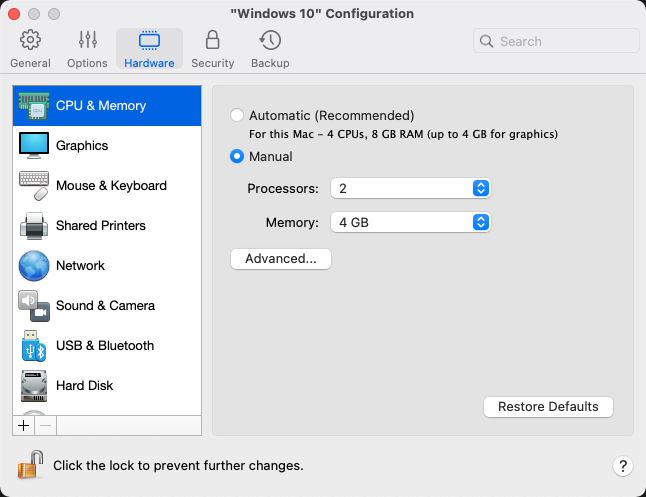
The number of processors and amount of memory can be set in the virtual machine’s configuration window. Parallels only recently updated the software to include an Automatic option, hence why I‘m not using it for this experiment.
Windows 10 Virtual Machine Configuration
Processors: 2
Memory: 4 GB
Other Details
My Excel version is:
Microsoft® Excel® for Microsoft 365 MSO (Version 2112 Build 16.0.14729.20038) 64-bit

The macOS ScreenFlow capture software will record the loading process of each dataset. To minimise any other disturbance, I will not be interacting with my computer whilst it is going on.
Data Preparation
The same data — found on Kaggle — will be used. Each file contains 15 columns of fictional adult census data, and there are ones for 100,000, 1 million, 10 million and 100 million rows.
The original files don’t have extensions, but can easily be converted to CSV format by adding .csv. This has no impact on their sizes.
https://www.kaggle.com/brijeshbmehta/adult-datasets
The following row counts will be tested:
- 1 million
- 5 million
- 10 million
- 50 million
- 100 million
As no files exist for 5 million and 50 million, I will create them by duplicating and combining files to reach the respective amounts. For 5 million, this will be composed of five 1 million files, while 50 million will use the same number of 10 million ones.
Usually, you might append the data from each file in the same worksheet and export it to a CSV file. This works fine up to 1,048,576, rows, but what about beyond?
Whilst Power Query does offer a way of combining large files, there is no export feature. However, the workaround is to use Power BI Desktop and DAX Studio.
Download them here:

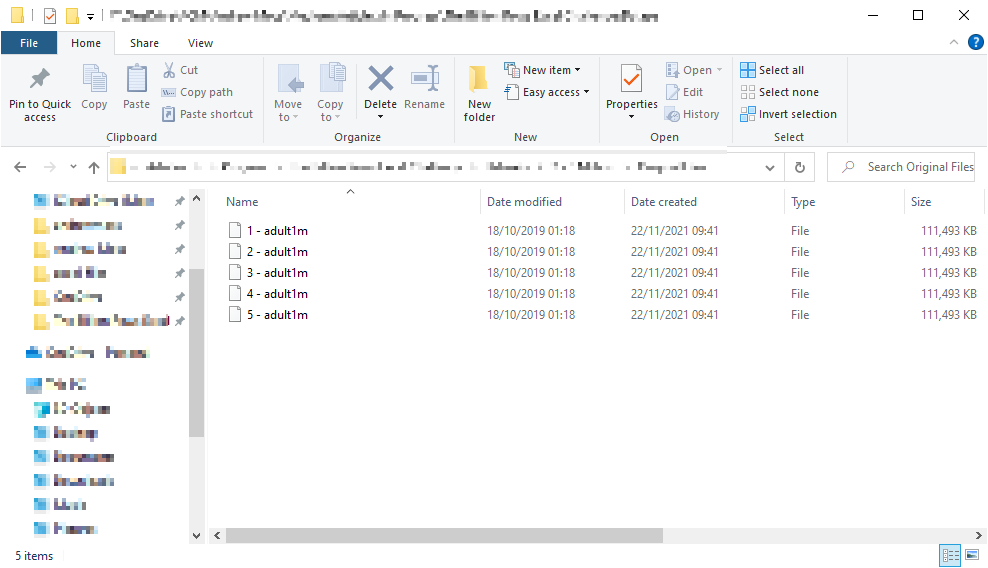
Place the files you want to combine in the same folder and ensure nothing else is present.
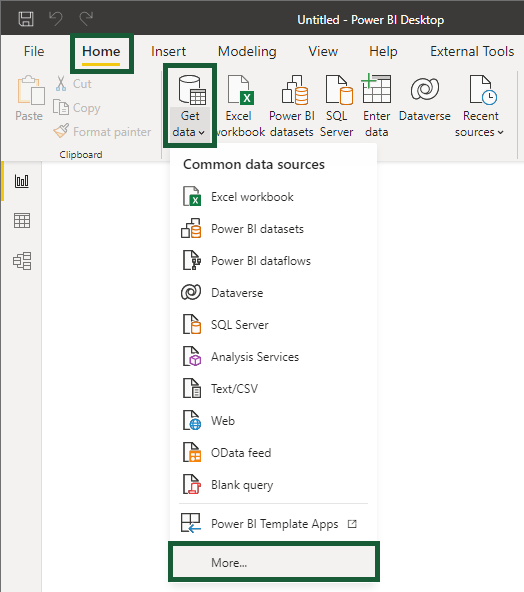
Open Power BI Desktop and go to Home (tab) > Get data (dropdown) > More… (button).
⚠️ You don’t need a Power BI account or to sign in to complete this task.
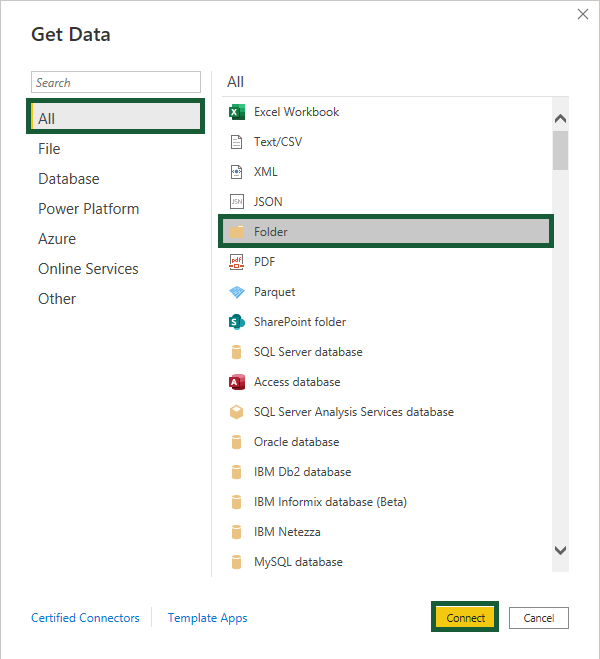
The Get Data window appears. With the All section selected, choose Folder and click Connect.
Browse for the folder containing the files and click OK.

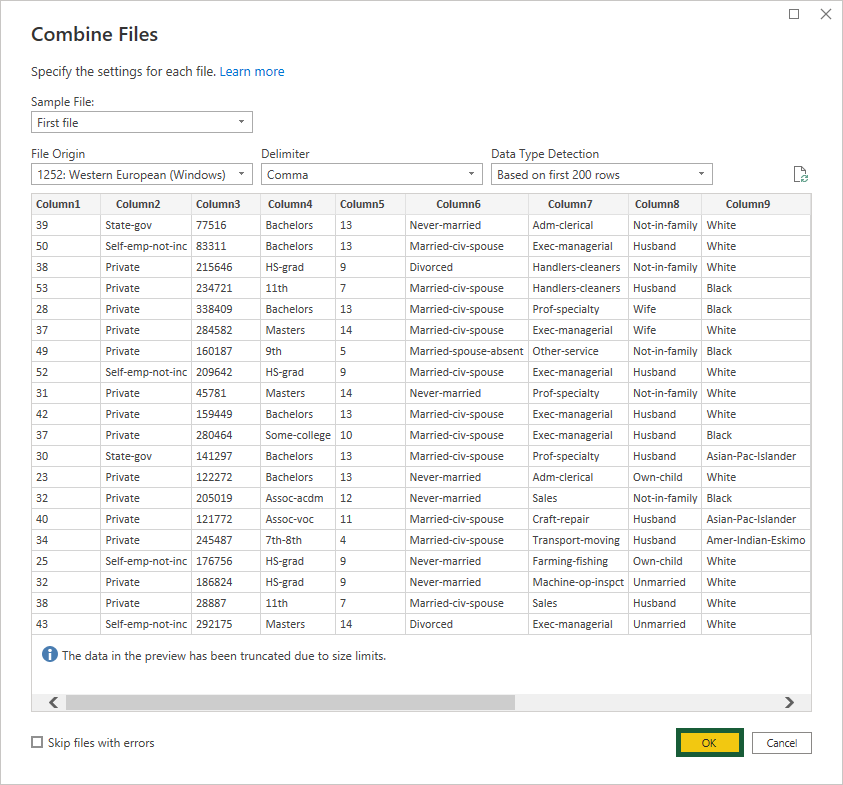
The next window shows the files about to be combined.
Select Combine & Transform.

Click OK again.
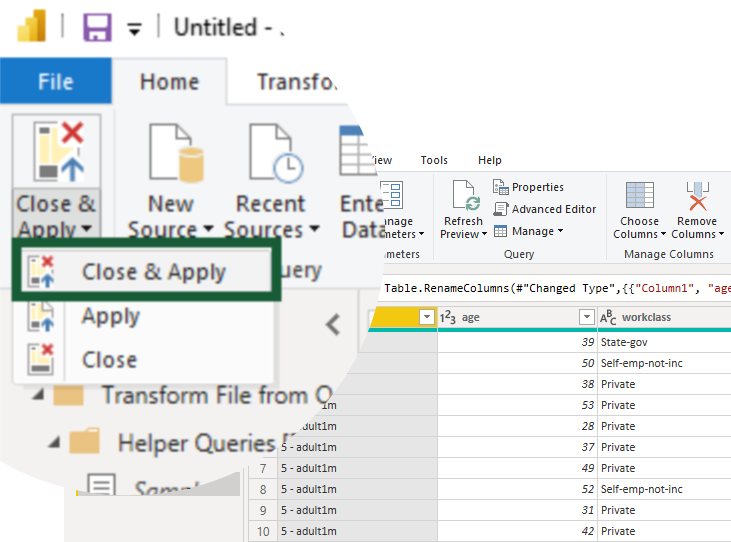
Power Query opens so the column names can be changed according to the attribute information. For example, Column1, Column2 and Column3 become age, workclass and fnlwgt, respectively.
An additional column—called Source.Name—is automatically added at the start. This shows the file name the row pertains to.
⚠️ You may not notice the Power Query window has opened because it appears behind Power BI Desktop!

Click Close & Apply to confirm the changes.
Back in the Power BI Desktop window, go to External Tools (tab) > DAX Studio (button).
⚠️ This tab/button will only appear with DAX Studio installed.

The DAX Studio window opens.
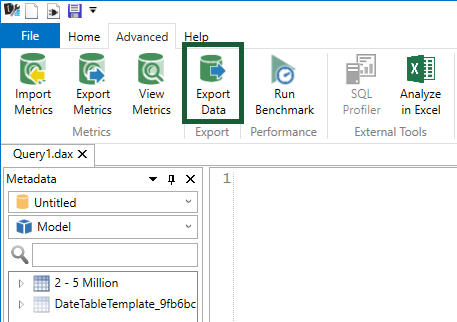
Go to Advanced (tab) > Export Data (button)
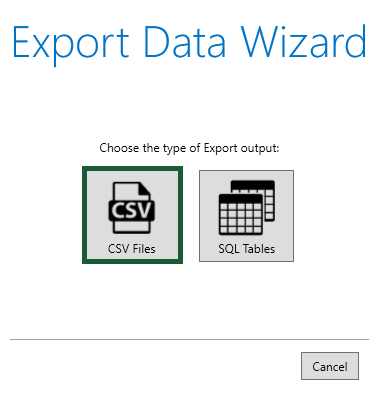
Click on CSV Files.
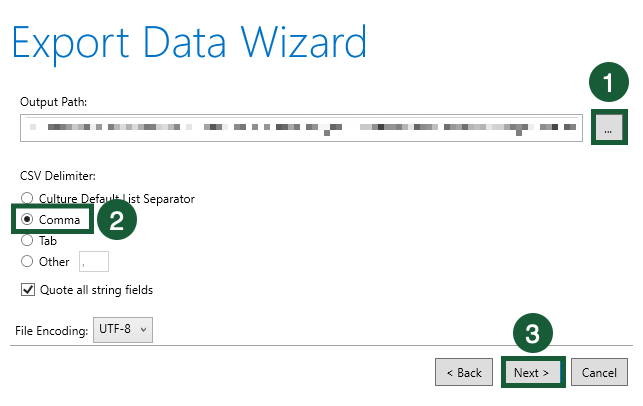
- Press the ellipsis button to select the folder where the CSV file will be exported to.
2. Pick Comma for CSV Delimiter so each entry will be separated by a comma.
3. Click Next.
- Untick the Include Hidden Tables checkbox.
2. Click Export.

The data will now export. Once it’s finished, hit Close.

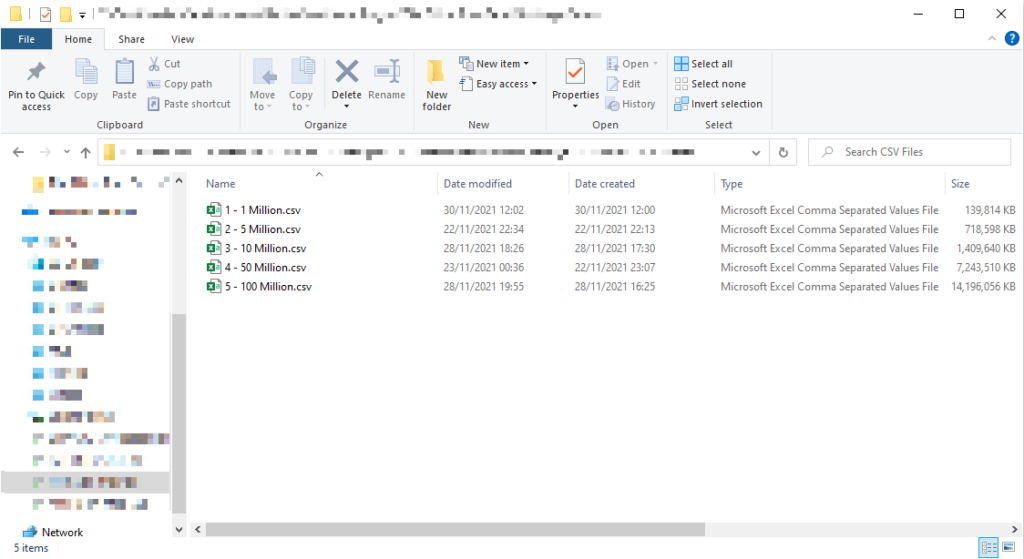
Check the folder you exported to and the file should be visible.
To be consistent, I also carried out these steps to the other datasets. This meant the extra column, Source.Name, was added to the new files as well.
Loading the Datasets
With the CSV files prepared, they can now be loaded into Excel one by one whilst being timed. Separate workbooks are needed, with Fast Data Load disabled in one and enabled in the other.
Let’s look at the steps for the first file, with Fast Data Load disabled.
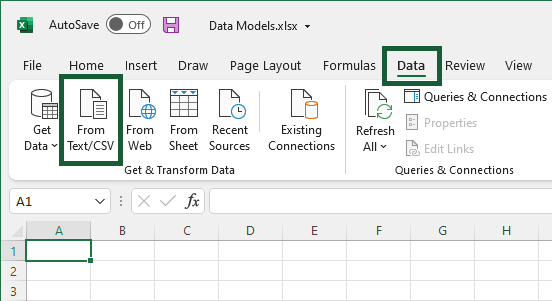
Go to Data (tab) > From Text/CSV (button).
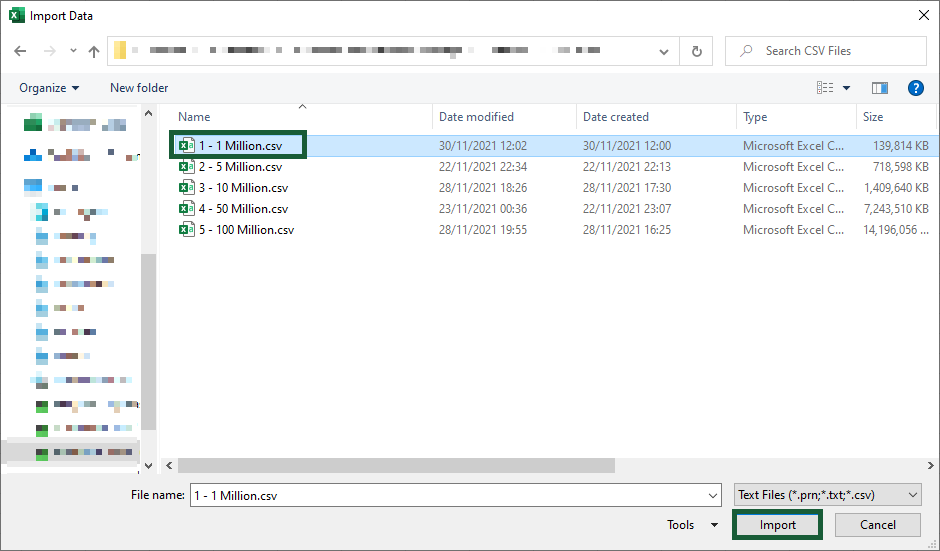
Select the file and click Import.
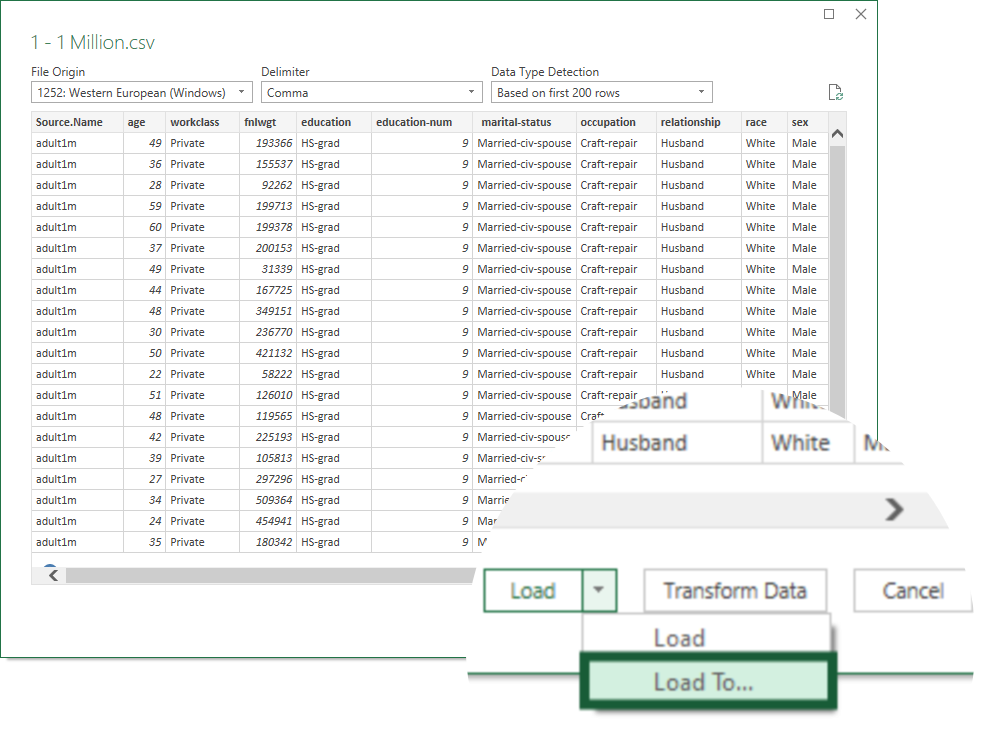
Press Load To…. from the dropdown.
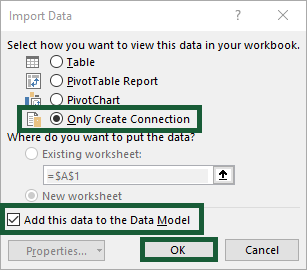
Choose Only Create Connection and tick the Add this data to the Data Model checkbox.
Only Create Connection establishes a link to the CSV file so the data can be retrieved. However, if the file is renamed or moved, the link will be broken and have to be updated.
Add this data to the Data Model imports the dataset so it becomes part of the Excel file. This means it is not dependent on the original file.
🔴 ⏰
At this point, I’ve just turned on ScreenFlow to record the screen. The stopwatch in the Alarms & Clock application is then started immediately before the next step…
Click OK.
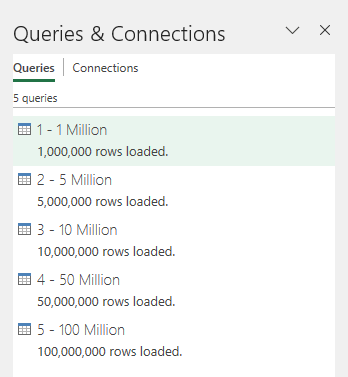
The query displays its loading progress in the side panel. Once it’s complete, the final number of rows shows.
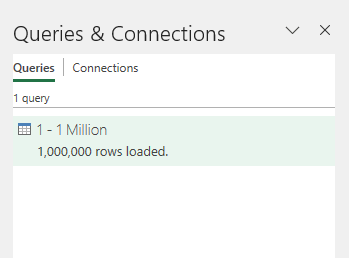
Repeat this exercise for the other datasets.
Create another workbook with Fast Data Load switched on and do the same.
Final Results

See it in Action
Watch each dataset being loaded in the video (sped up, of course):
Conclusion
The results clearly show a time-saving benefit of Fast Data Load; however, you will feel it a lot more with larger datasets. Saving eight seconds to load a million rows is barely worth it, but loading 100 million 20 minutes faster? That surely is.
Percentage-wise, the time saved averaged 26%. There would likely have been a further boost if I increased my virtual machine’s processors and memory, but to what degree? I know anecdotally it can make a difference, however, it’s not as simple as just maxing them out.
Given the virtual machine is running on top of the main operating system, allocating it too many resources is as much of a problem as allocating too few. There is a happy medium to find — but it isn’t 50-50.
Further tests would have to be carried out under the same and different circumstances to enhance the understanding and reliability of the experiment.
On a final note, if you want Fast Data Load on whilst a query is loading but still want to use Excel, try running a new instance of the program. It is possible to run the same workbook in a separate instance, although it will be read-only. Still, it’s useful if you‘re working in multiple workbooks.
More details are found here:
https://www.linkedin.com/feed/update/urn:li:activity:6874104803803373568/


Unfortunate—if you used to be able to multitask while PQ locked up Excel via a different Excel instance (and not just a new window), I don’t think you can anymore (I haven’t tried this on MacOS, FWIW). Best solutions I’ve come up with are using Excel for Web to do basic stuff or pulling out an entirely different machine, like a laptop, and using that instead.